Video Overview
What this video covers:
Creating a membership and understanding its membership product options.
Note: You may get a blank screen when editing a membership, or the form may disappear. In that case, create a new admin user and try editing with that user. See Also:
Can’t Edit Membership.
Creating a Membership
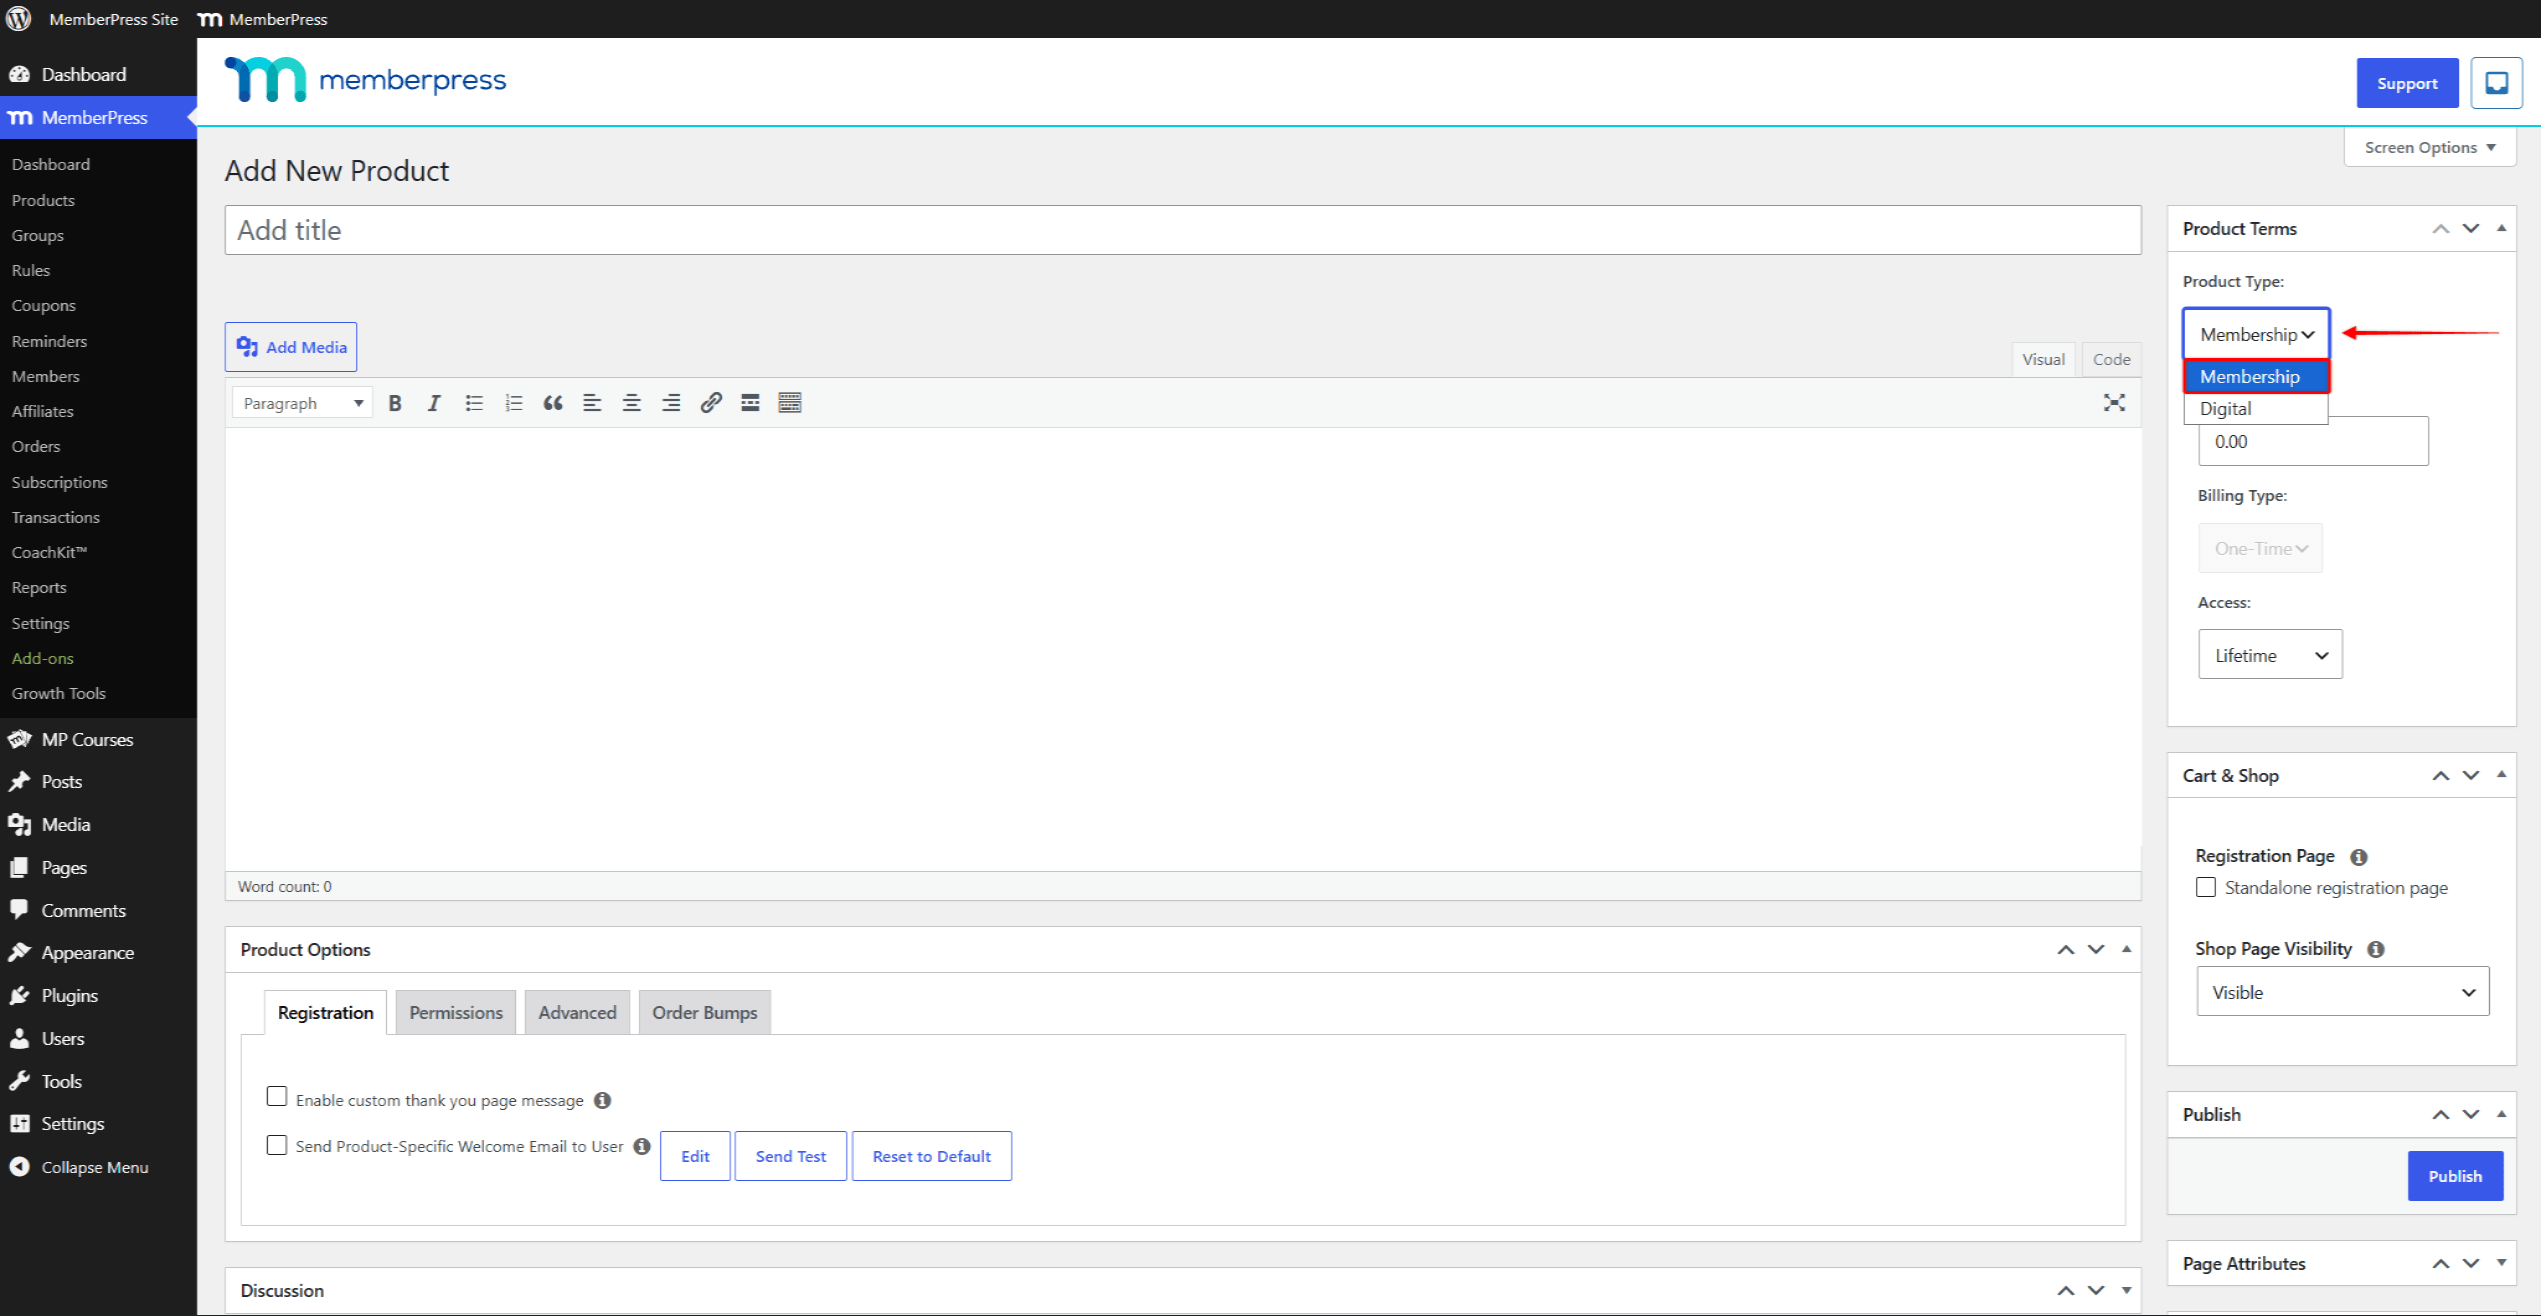
In MemberPress, a membership is a type of product. Creating a membership is very similar to creating a page or post in WordPress. To set up a membership, do the following:
- Navigate to Dashboard > MemberPress > Products, and click the Add New Product button. The Product Type is set to “Membership” by default. Leave this default to create a membership.
- Set a Title for the membership (Example: Basic Membership). The title is required and should have some value.
- Set a price and subscription term for the membership, as explained in the membership pricing terms documentation. You can select a One-Time payment for lifetime access. One-Time access can also expire after a set number of days, weeks, months, or years, or on a fixed date. You can also enable Recurring subscriptions. These can bill Weekly, Monthly, every 3 or 6 Months, Yearly, or at a custom interval of weeks or months. As a simple example, say you chose recurring subscription every Month. This would mean that your members will be charged the amount of the membership every month.
- (Optional) Set a Trial Period on the membership. A trial period lets your members demo the membership before they purchase. You can choose to set the trial as free or discounted in price. Check the “Allow Only One Trial” option to limit users to one trial of this membership. Enter the trial period in days. Multiples of 7 display as weeks. Multiples of 30 display as months, and multiples of 365 display as years. NOTE: numbers greater than 14 that are not divisible by 7, 30, or 365 may cause payment processing issues with your gateway.
- Add some text/images to the body of the membership. This is where you present the key benefits of your membership to potential customers. The membership content shows up on the front end like a regular WordPress page, so feel free to get creative with your page layout, content, and design. Customers purchase the membership through its registration page, or through the cart checkout when the cart is enabled.
- Set who can purchase the membership. “Everyone” means everyone, including guests and logged in members, can purchase the membership. “Guests” means only non-registered members can purchase. And finally, “Members” means only users who have previously purchased memberships can purchase. You can use this last option to prevent members from buying a membership until they have first bought some other membership.
- Lastly, configure the Group Page Pricing Box Display. As you make changes to the display options, you can get a feel for how it will appear in the Preview box. Check the MemberPress groups documentation for a more in-depth explanation of groups.