Once you install and activate the MemberPress plugin on your site, you must configure it. On the MemberPress settings page, you can change the default settings and configure MemberPress to your needs.
This document guides you through the basic setup of MemberPress settings and default pages.
MemberPress Settings
When you first use MemberPress on a website, the onboarding wizard guides you through the basic setup. This is only the first step in building a membership site.
The wizard covers the basic principles and settings while using the defaults. Most websites need additional features and customizations based on their membership structure, business model, and sales strategy.
The recommended starting point is the MemberPress settings page at Dashboard > MemberPress > Settings.
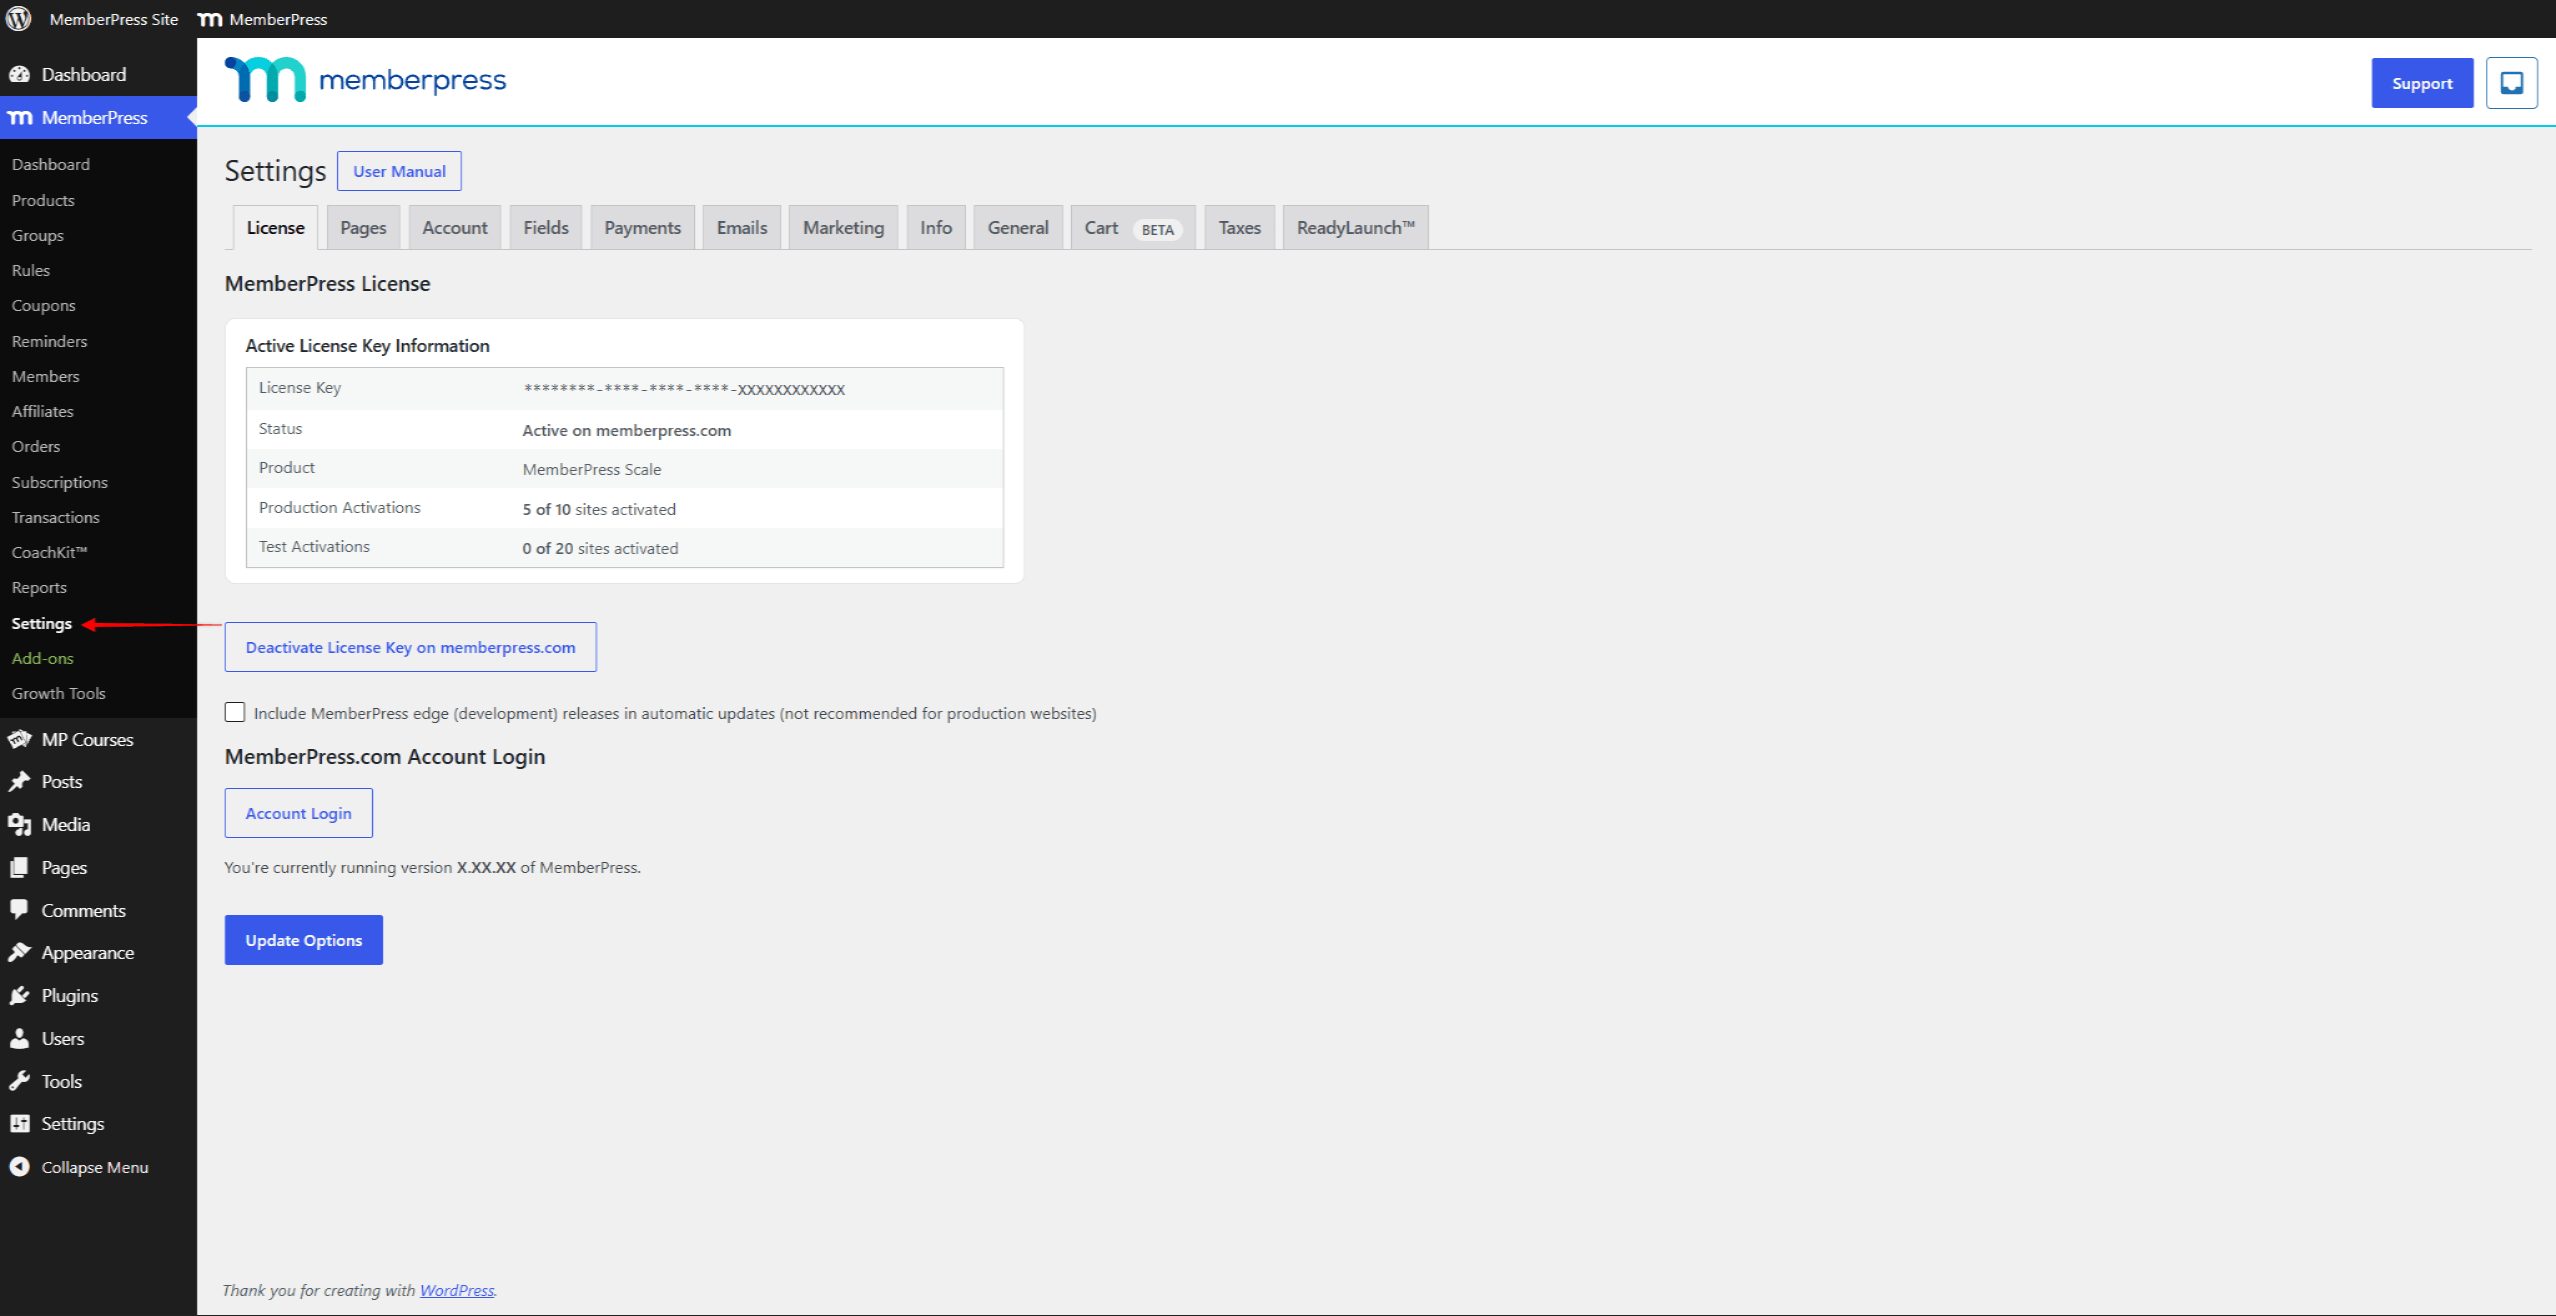
You can also open this page by clicking Settings under the MemberPress option in the admin bar.
The settings page has several default tabs. Each tab holds the settings for one area of the plugin:
- License;
- Pages;
- Account;
- Fields;
- Payments;
- Emails;
- Marketing;
- Info;
- General;
- Cart;
- Taxes;
- ReadyLaunch™.
Default (Reserved) Pages
Next to the default settings, MemberPress also creates default pages. When installed, MemberPress adds several pages automatically. These are called reserved pages because a membership site needs them to work. Each default page has its own function and template:
- Thank You Page: the purchase confirmation and summary page. Members land here after a successful purchase. The default slug is
/thank-you; - Account Page: the member account page. It holds all member information, including personal data, payments, subscriptions, courses, and gifts. The default slug is
/account; - Login Page: the member login page. It replaces the default WordPress login page. The default slug is
/login.
Build these pages into your website with the user experience in mind. It helps to understand how they work and how to manage them.
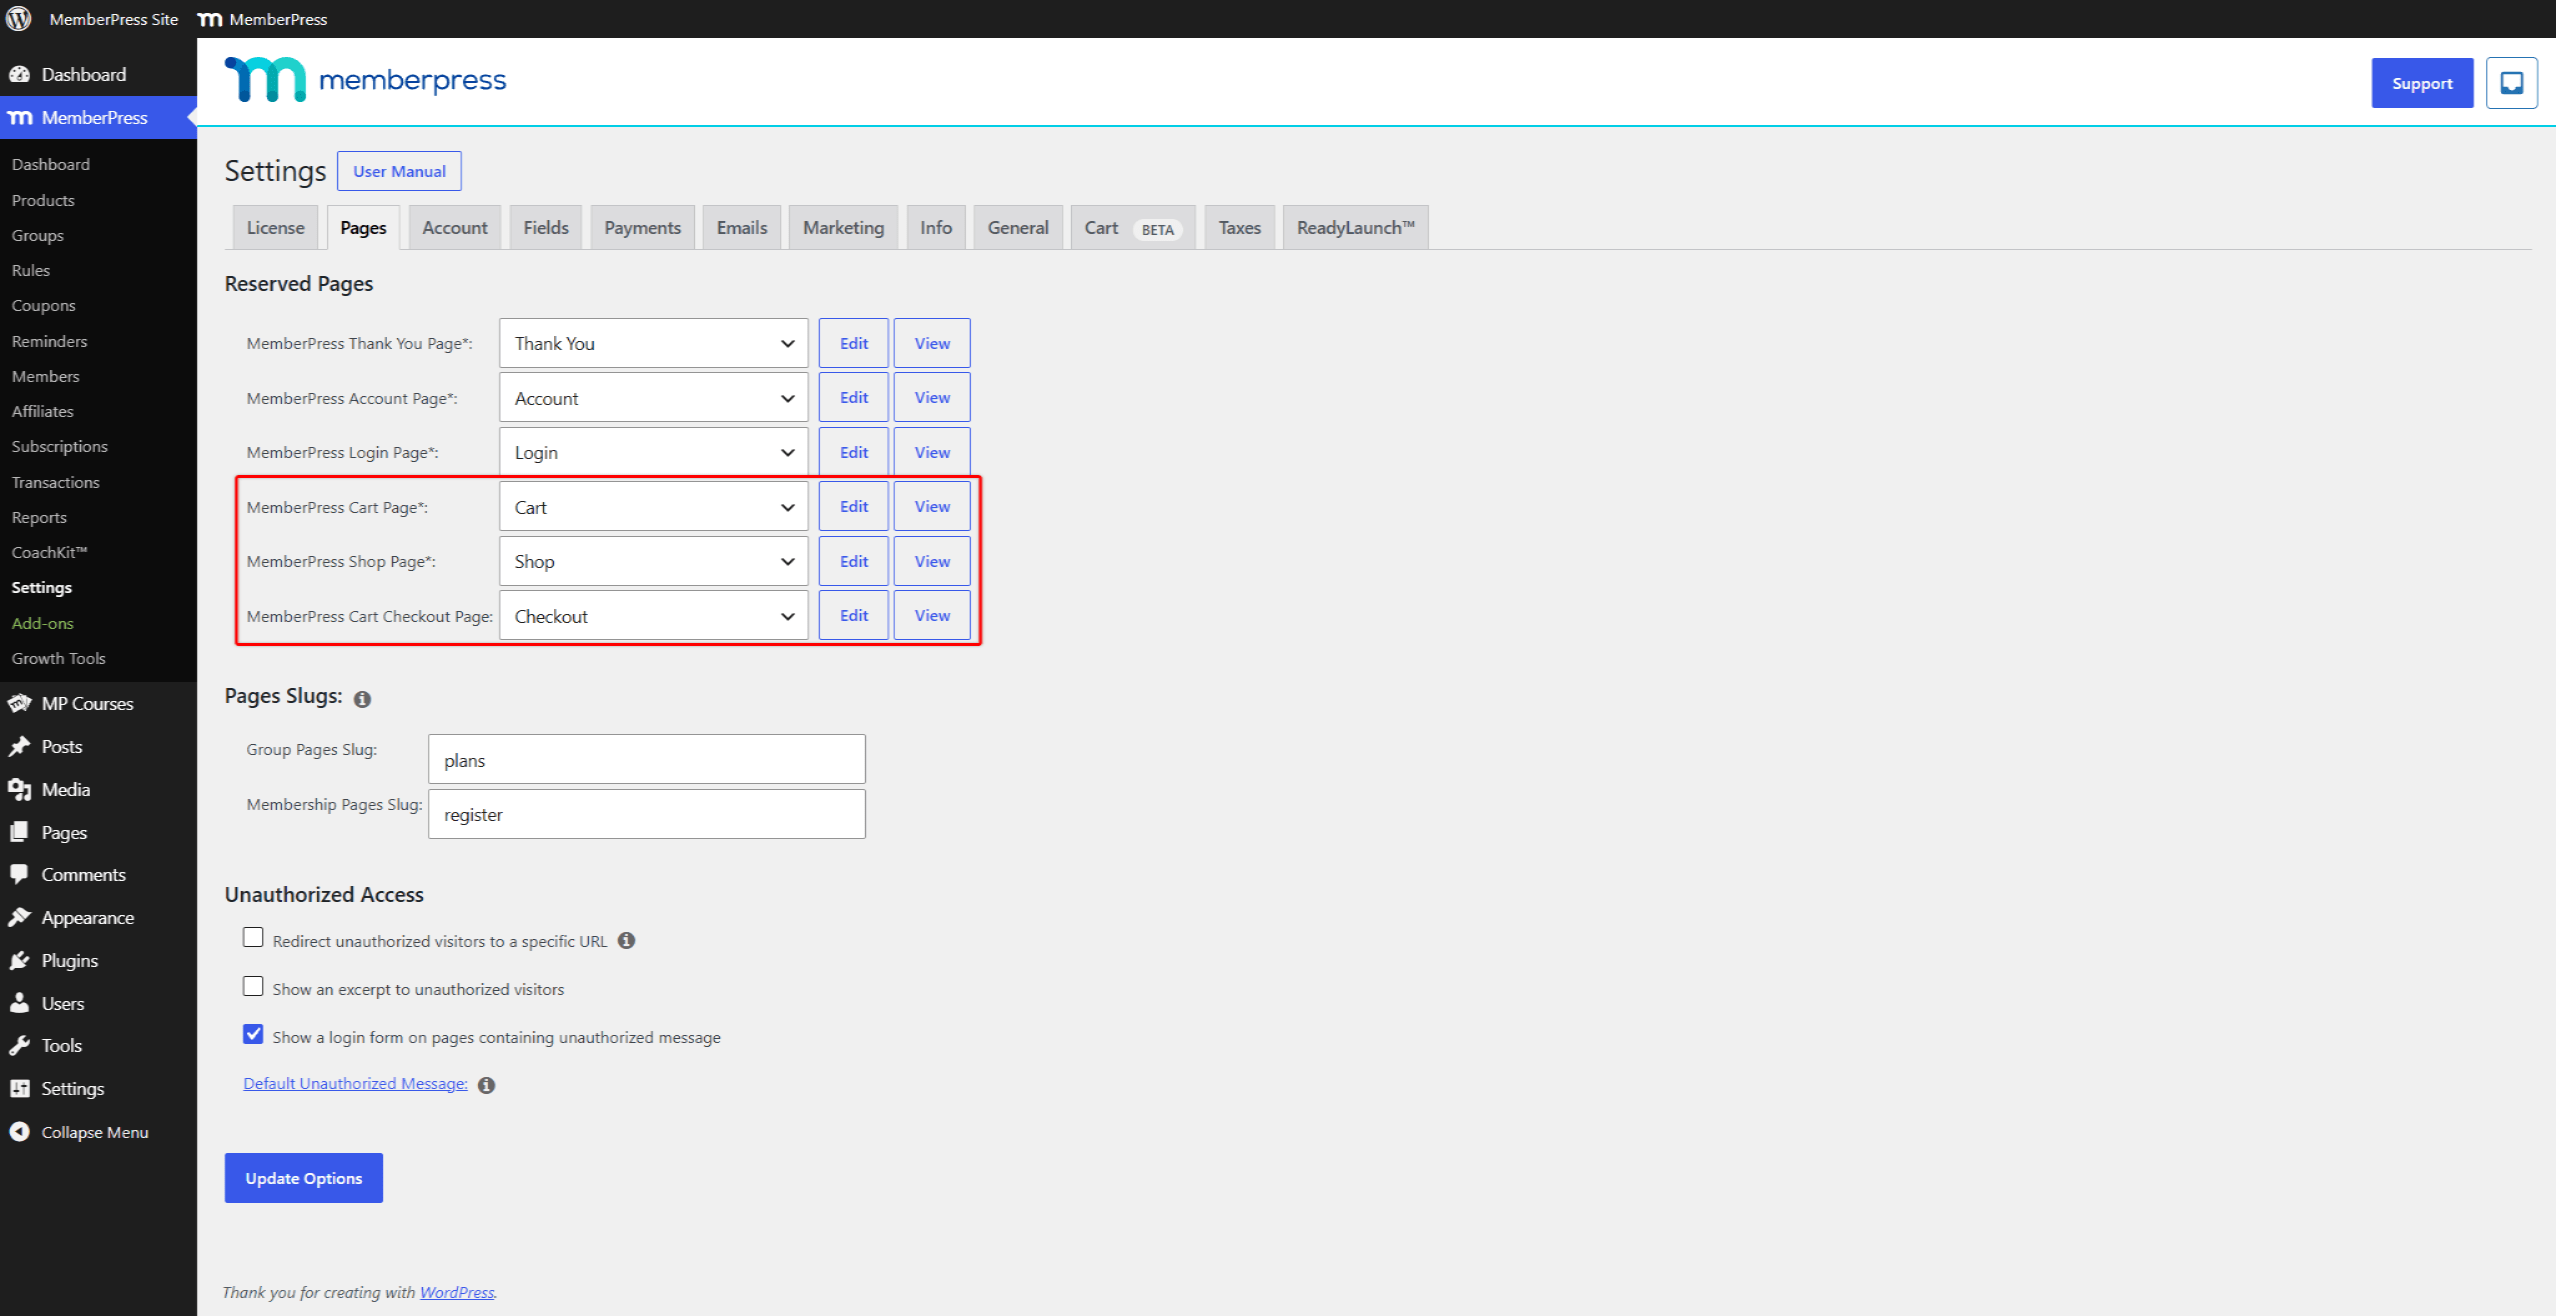
You can edit or view default pages under Reserved Pages on the Pages tab in MemberPress settings. At Dashboard > MemberPress > Settings > Pages tab, each default page has Edit and View buttons.
You can configure the default Login, Account, and Thank You pages to your needs.
Activating MemberPress add-ons can add more default pages here. For example, the CoachKit™ add-on adds the default Coaching page.
Enabling the MemberPress shopping cart adds three more reserved pages: Cart, Shop, and Cart Checkout. MemberPress creates them when you enable the cart, not at installation.
Memberships, groups, and some add-ons (for example, Courses) also come with their own default pages.
Default Registration And Pricing Pages
MemberPress generates a registration page whenever you create a membership. This page holds the registration and payment form for that membership.
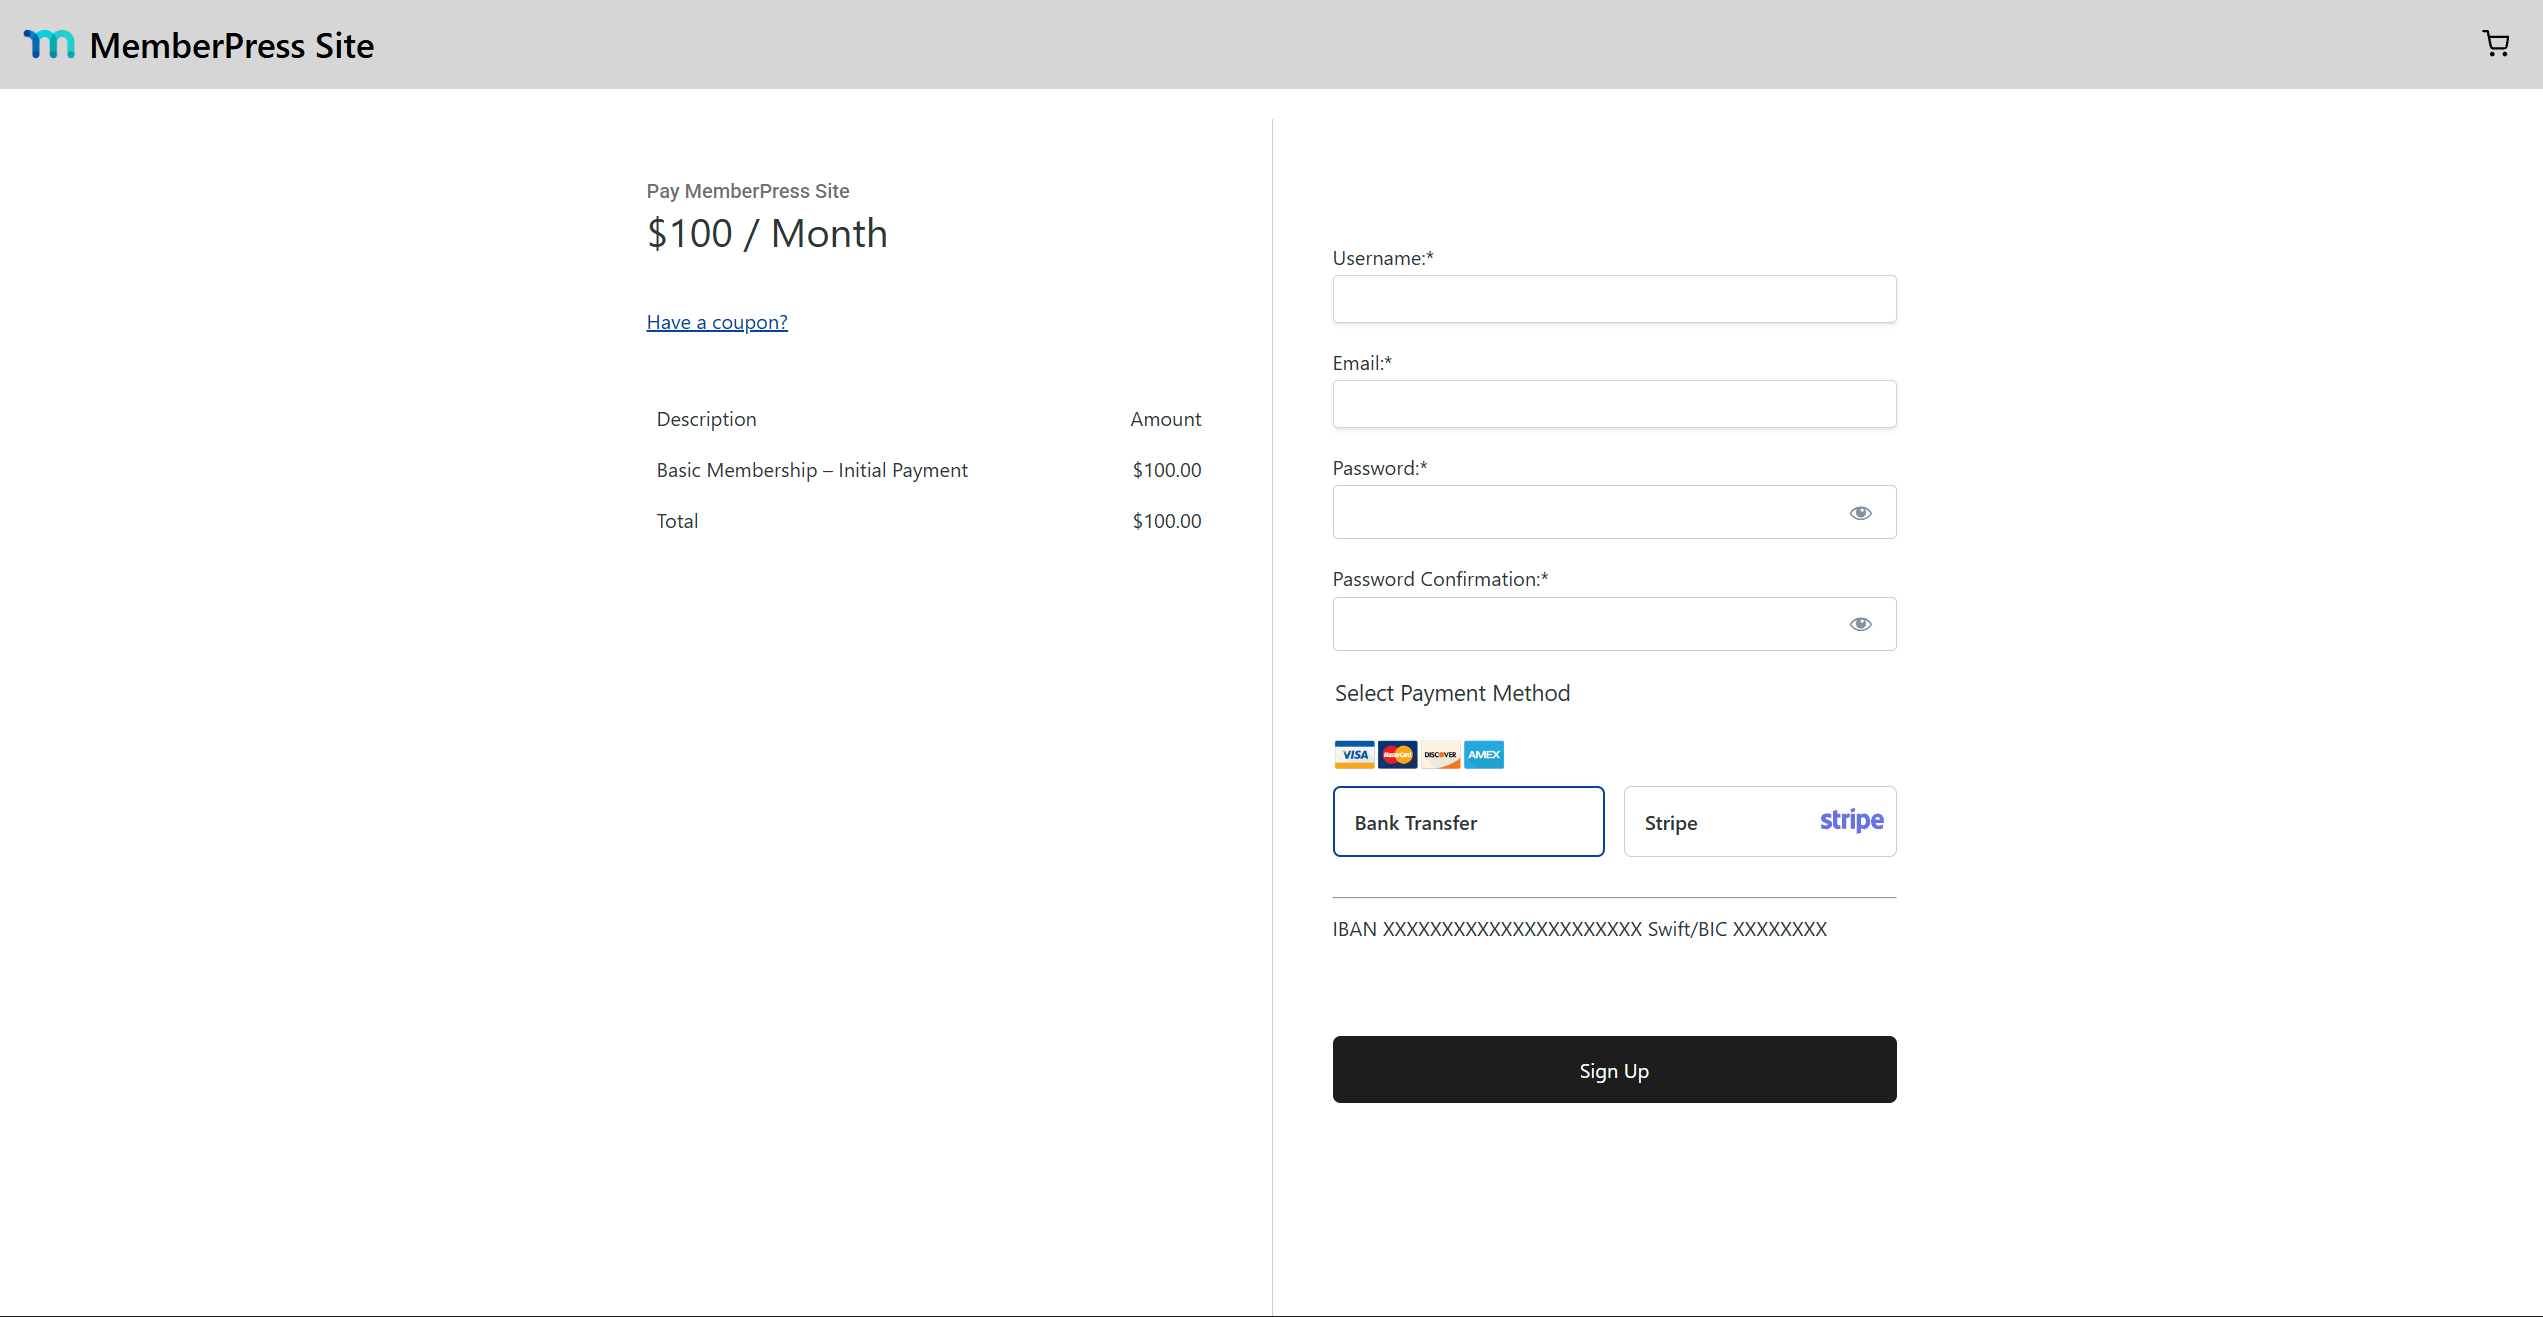
You can configure the registration page of each membership separately, though this is not required.
When you create a group of memberships, MemberPress generates a pricing page for the group. All memberships in the group are added to and linked from this pricing page automatically.
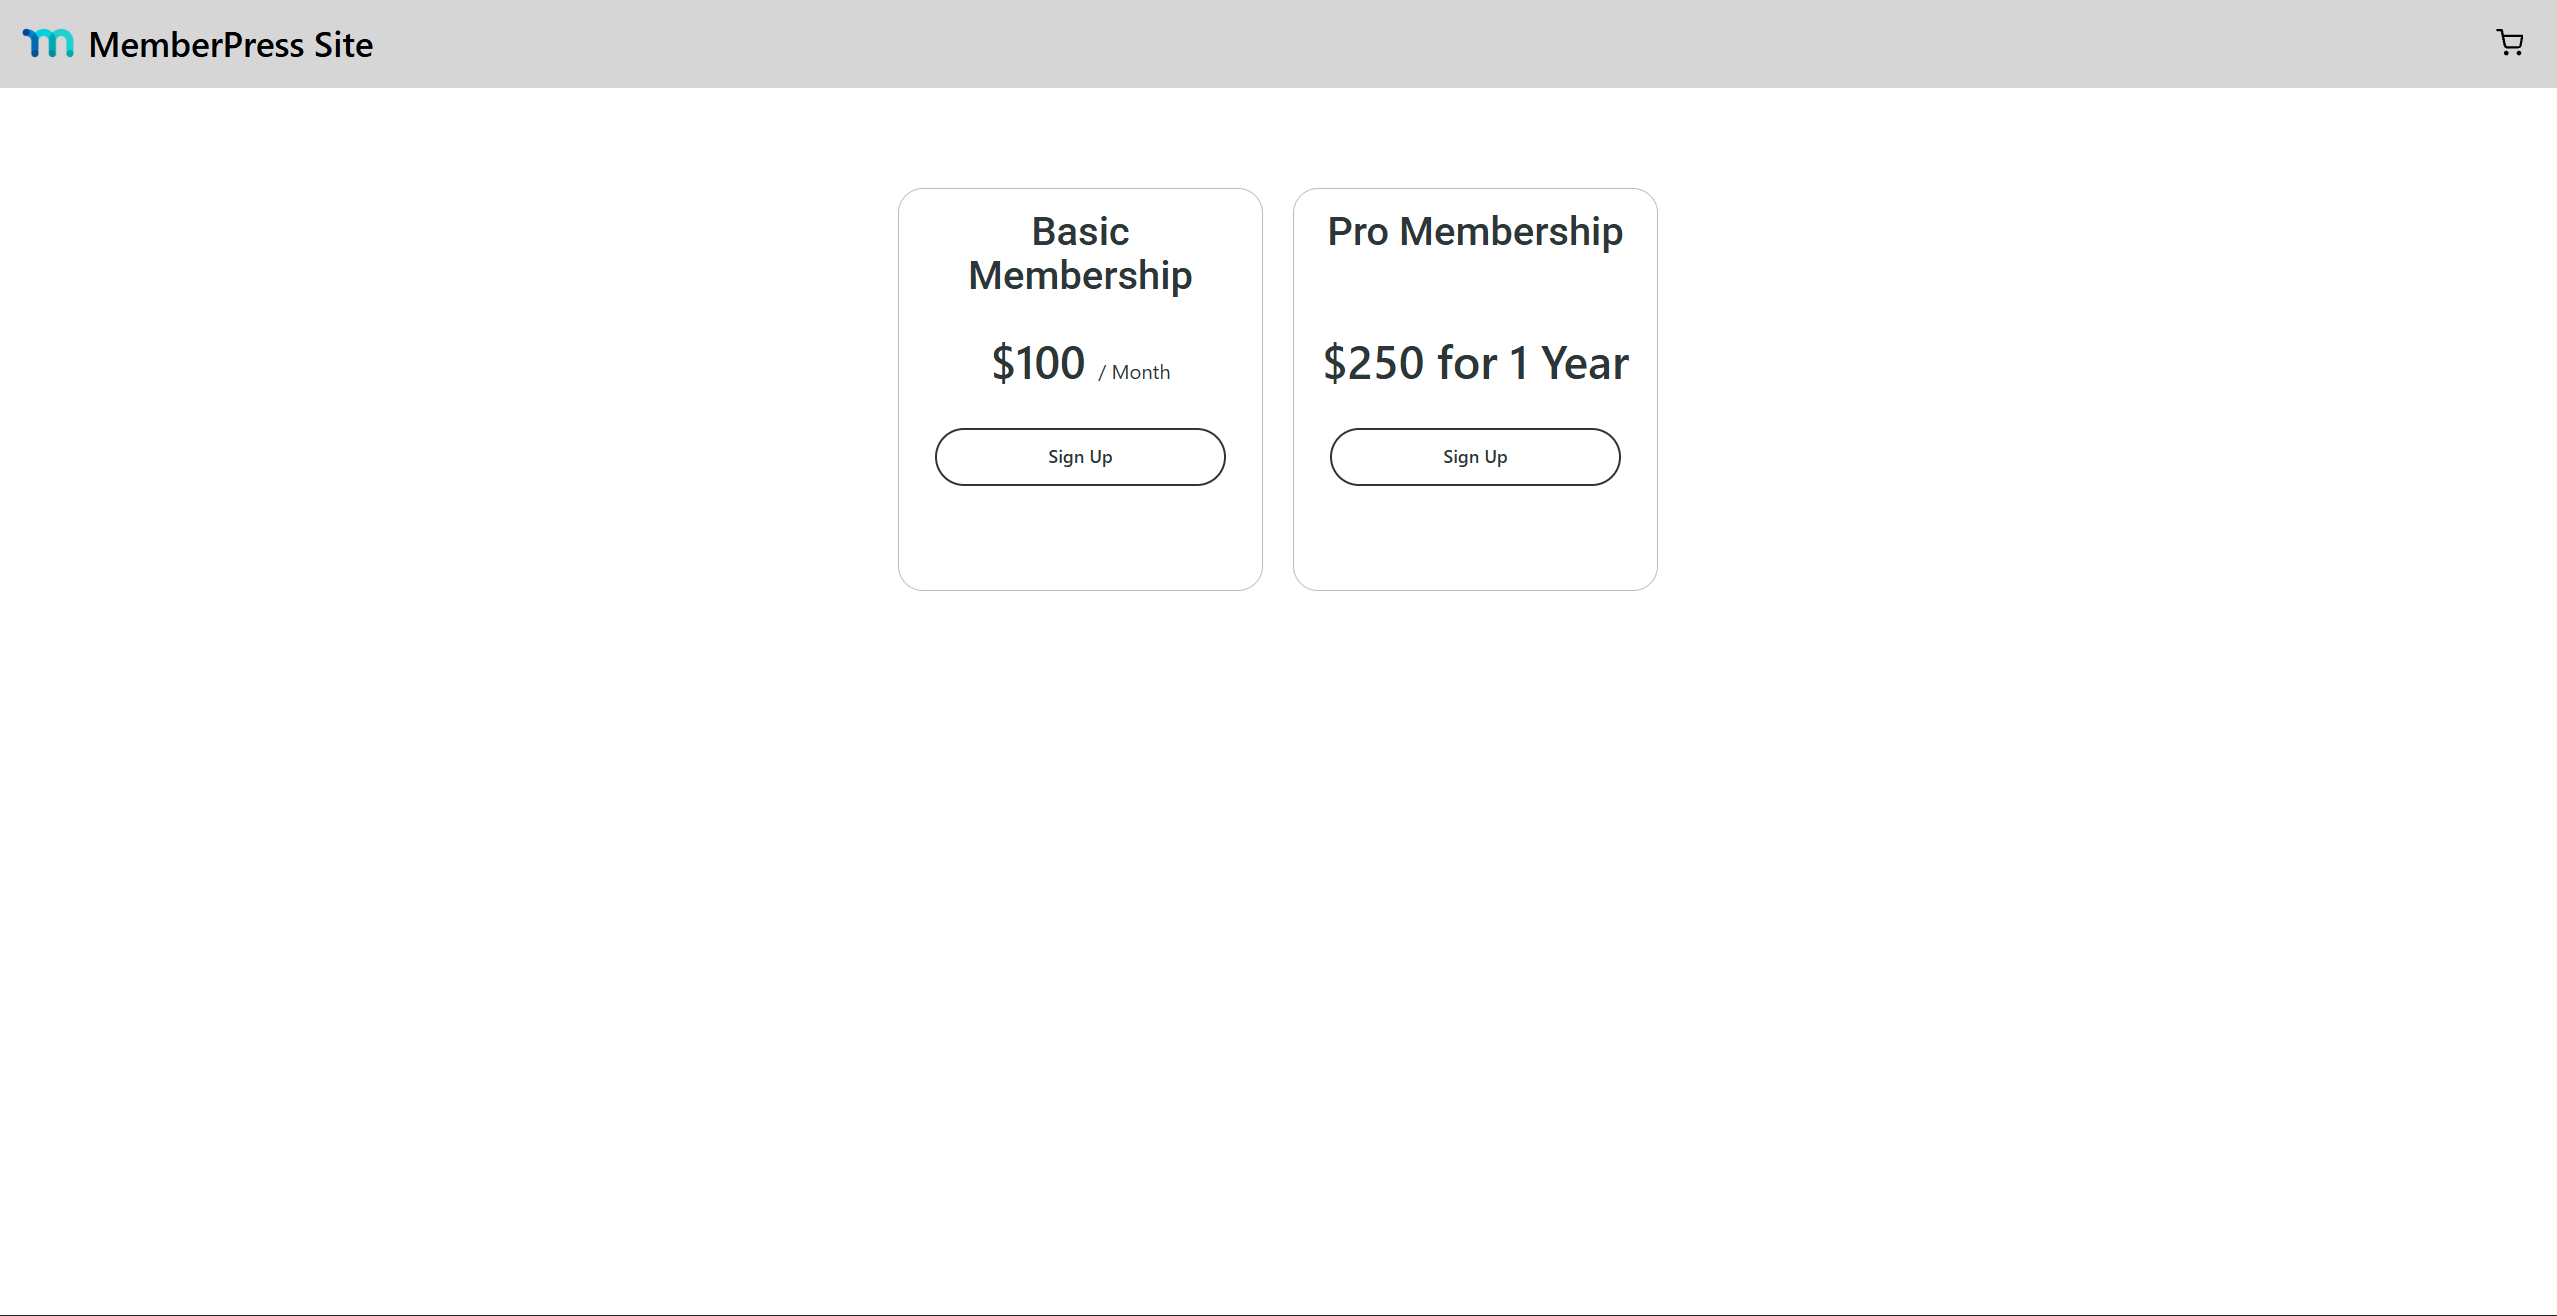
Link registration pages throughout your content and menus to make subscribing easy. Do the same for pricing pages.
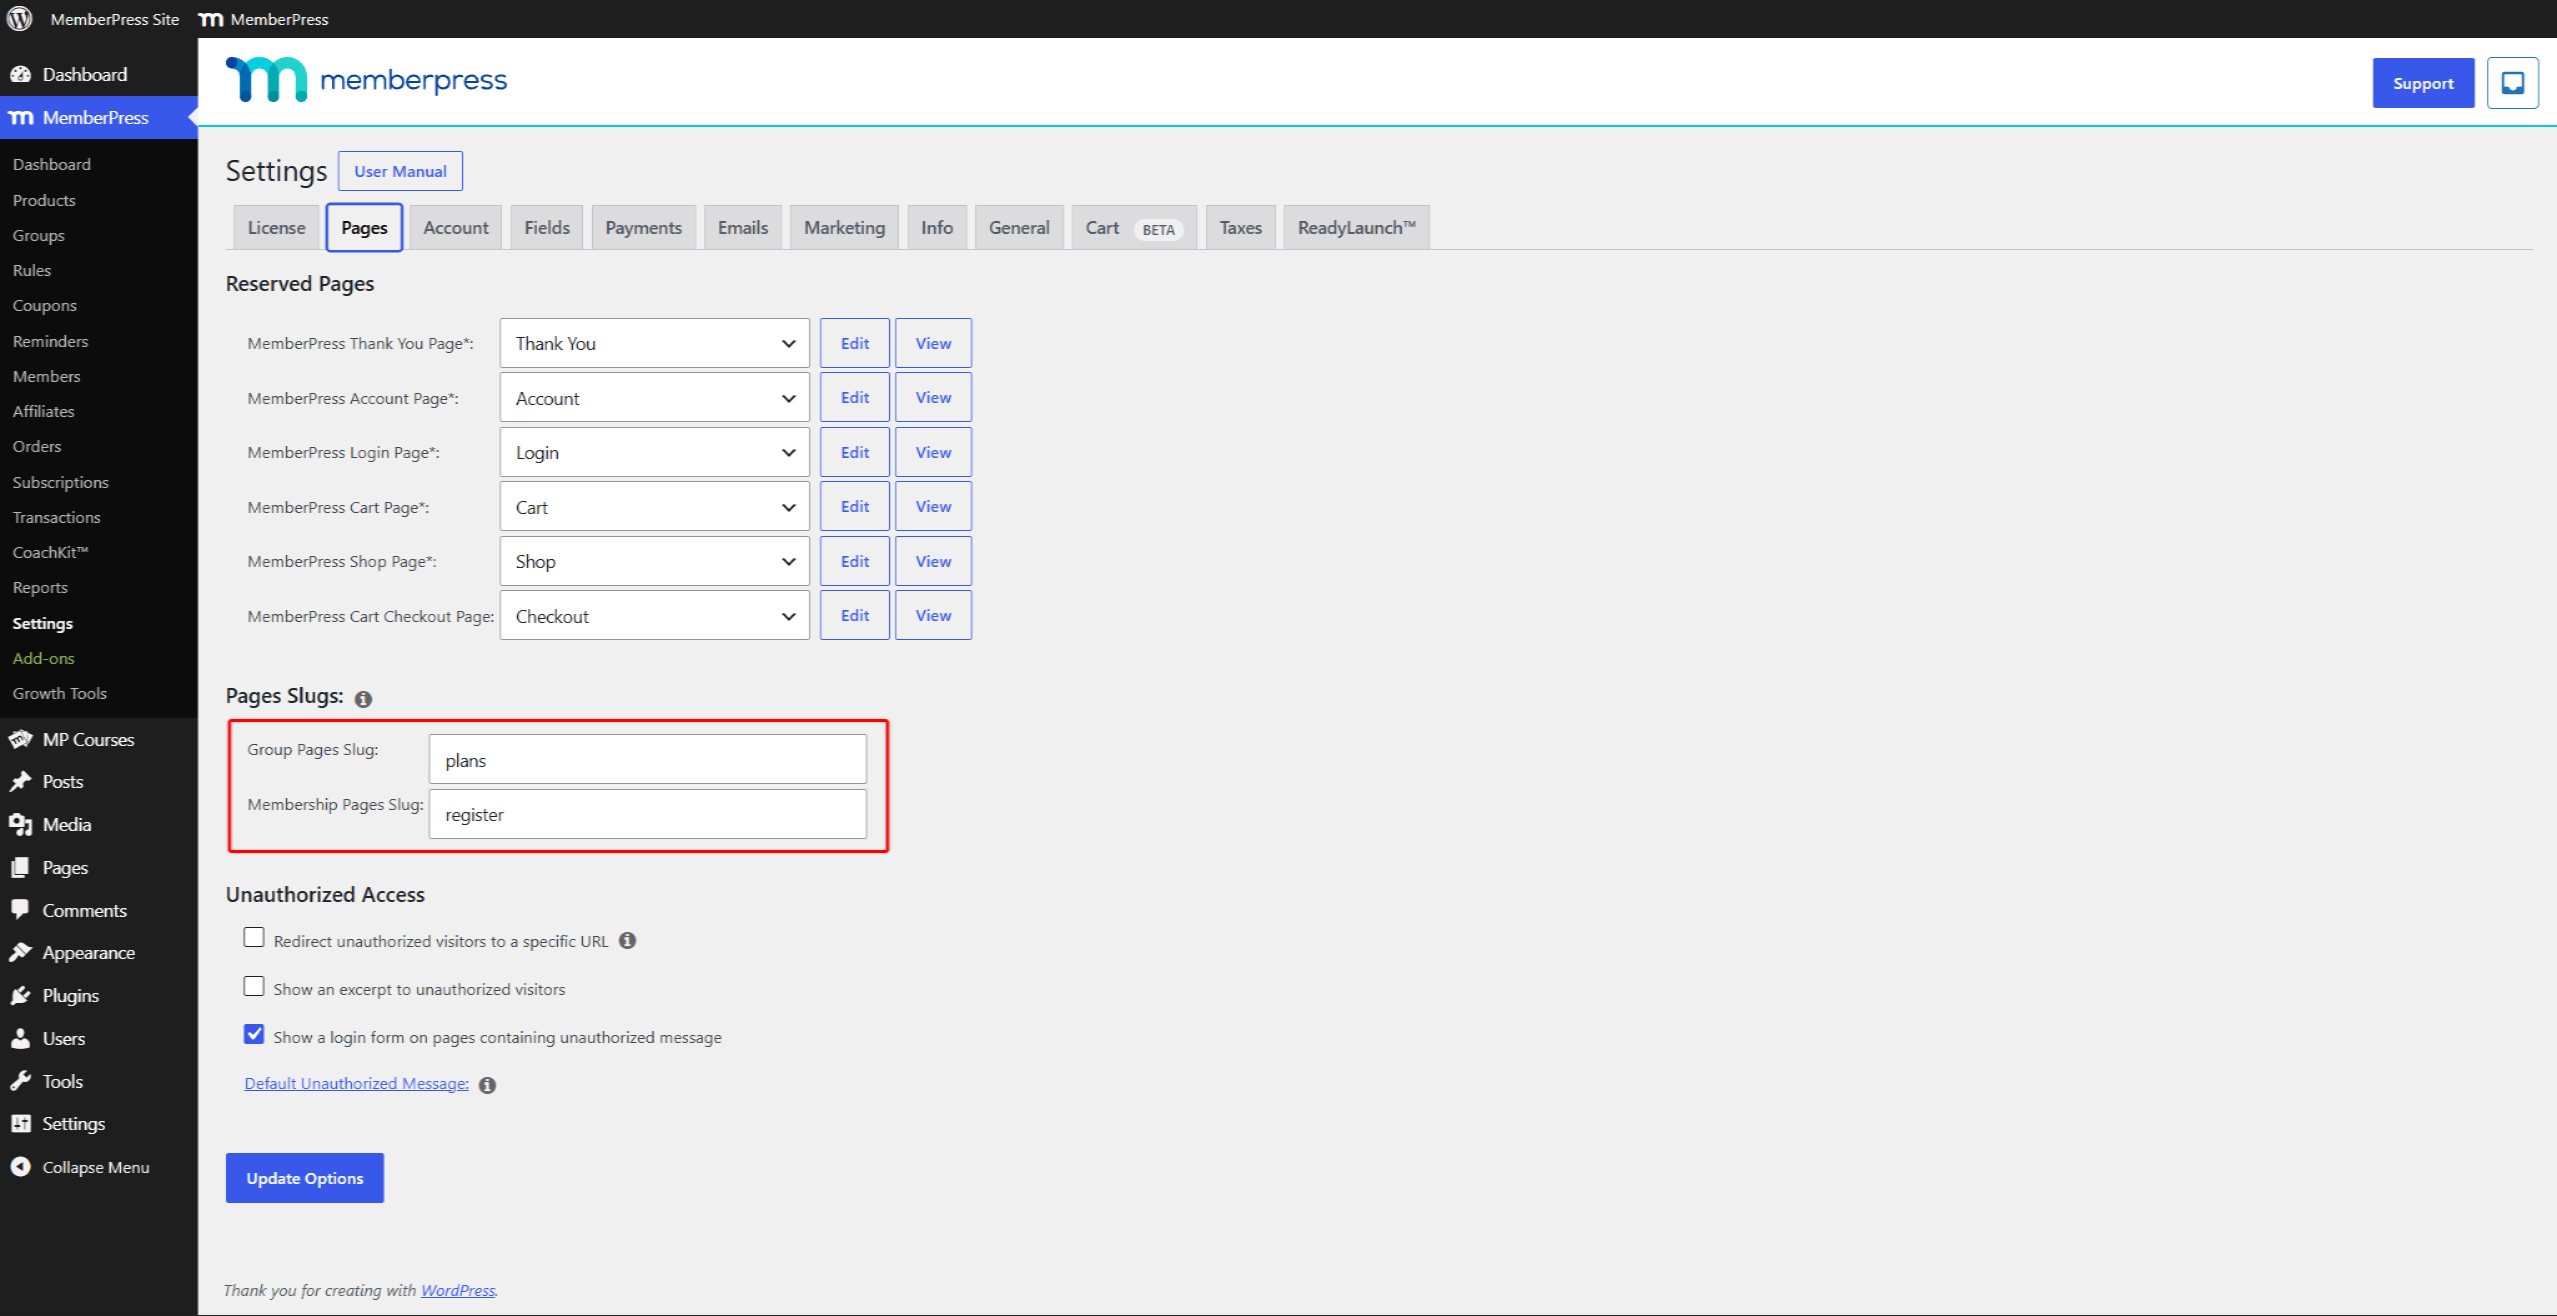
Each membership has a unique registration page and URL, and each group has a unique pricing page and URL. By default, registration pages use the /register/membership-name slug format. Pricing pages use the /plans/group-name slug format.
If needed, you can change both slug formats on the Pages tab in MemberPress settings.
Page Templates
Each default page has several template options. Templates are built-in designs for MemberPress default pages. The page function stays the same whichever template you use.
You can use the Classic or the ReadyLaunch™ template for each default page type. By default, ReadyLaunch™ templates are enabled for all default pages. The toggles sit under ReadyLaunch™ Templates on the ReadyLaunch™ tab. The registration page template is labeled Single Product Page there.
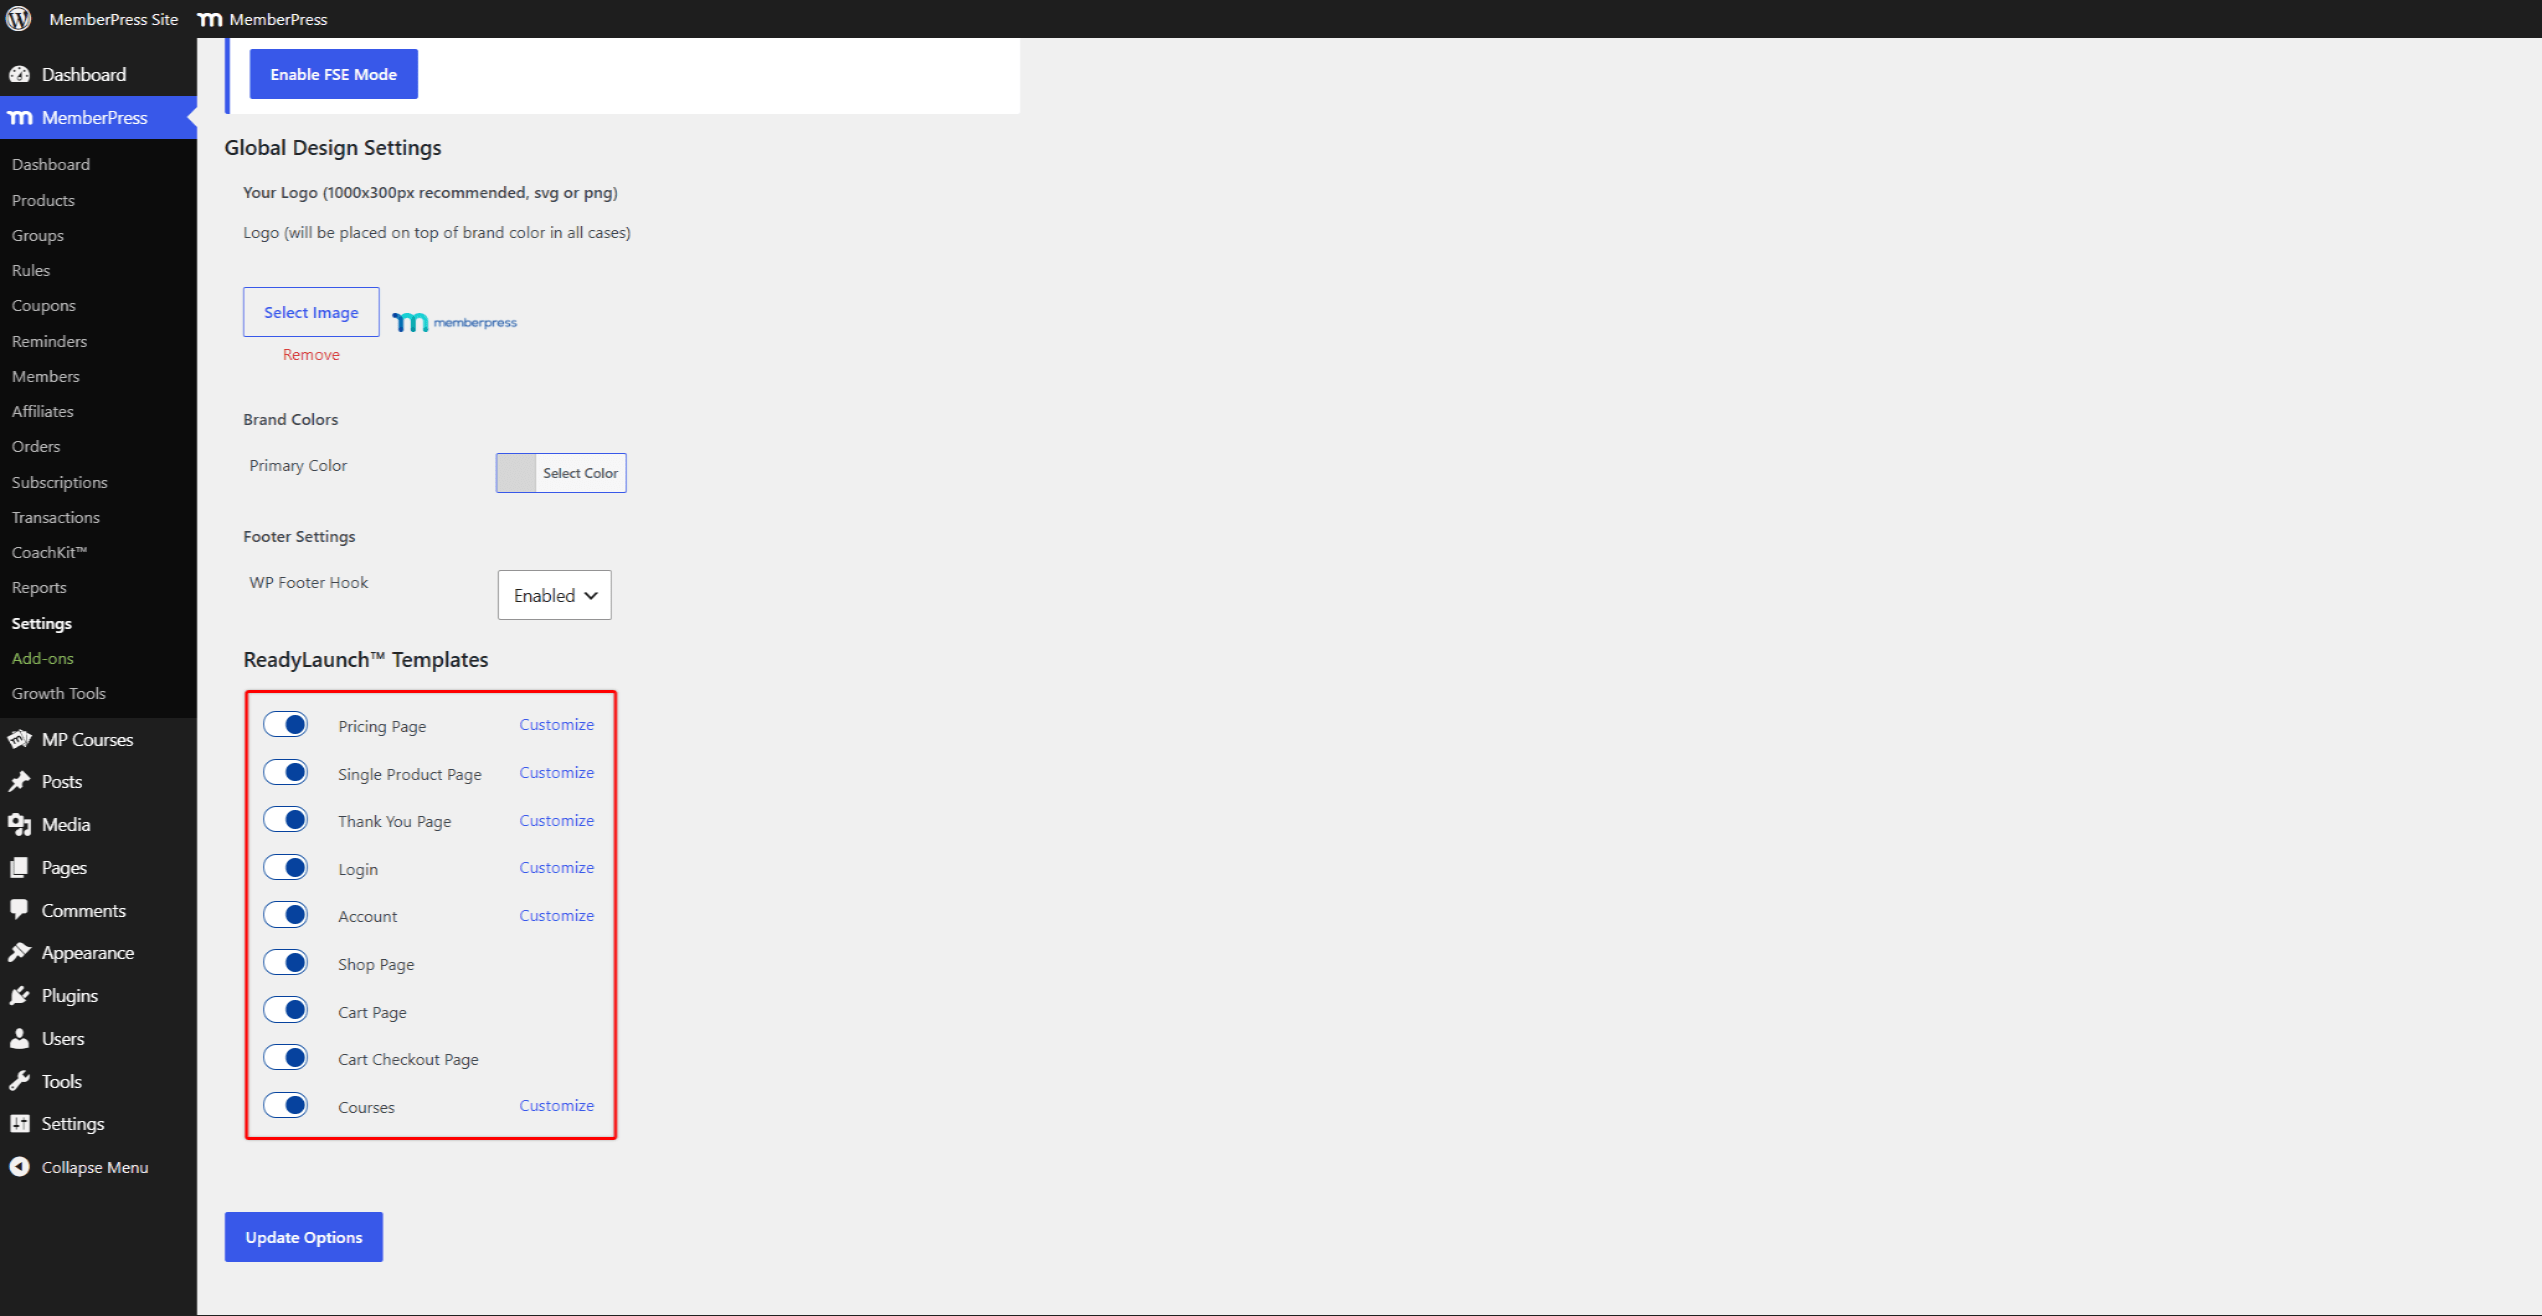
ReadyLaunch™ templates come with global settings applied to all templates, plus page-specific settings:
- Pricing Page Settings;
- Registration Page Settings;
- Thank You Page Settings;
- Login Page Settings;
- Account Page Settings.
If needed, you can switch to the Classic template by disabling the ReadyLaunch™ template for each default page type separately.